Photo encaustic opens up new creative possibilities, blending the precision of photography with the rich texture and depth of wax. This technique allows photographers to transform their images into tactile, painterly works of art.
“Photographers are increasingly discovering the potential of combining photography and wax. Given the importance of light in photography, it seems a natural marriage, since wax refracts light in unique ways and can add an otherworldly quality to photographs.”
Lissa Rankin
ENCAUSTIC ART The Complete Guide to Creating Fine Art with Wax
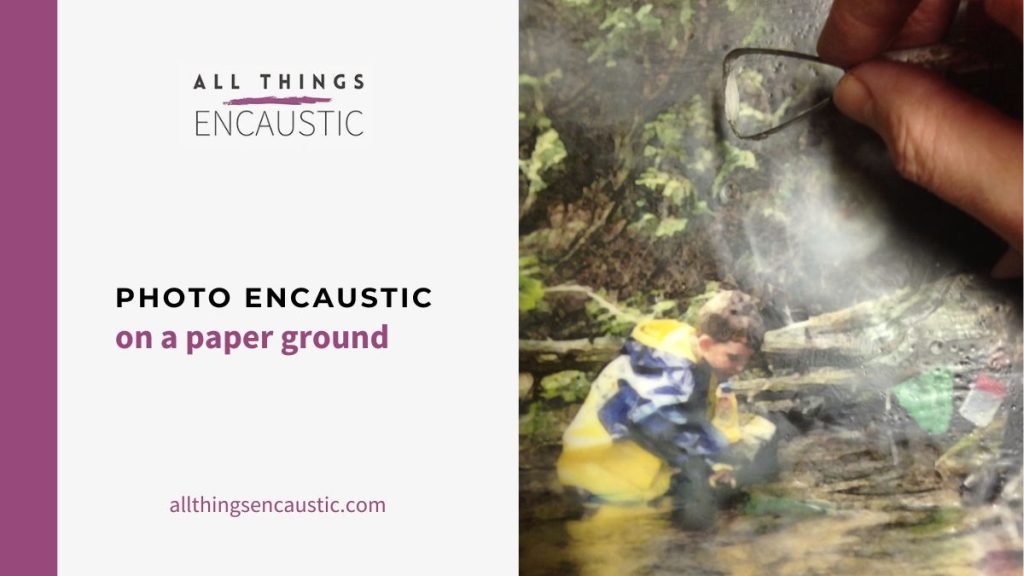
Step-by-Step Guide to Photo Encaustic on a Paper Ground:
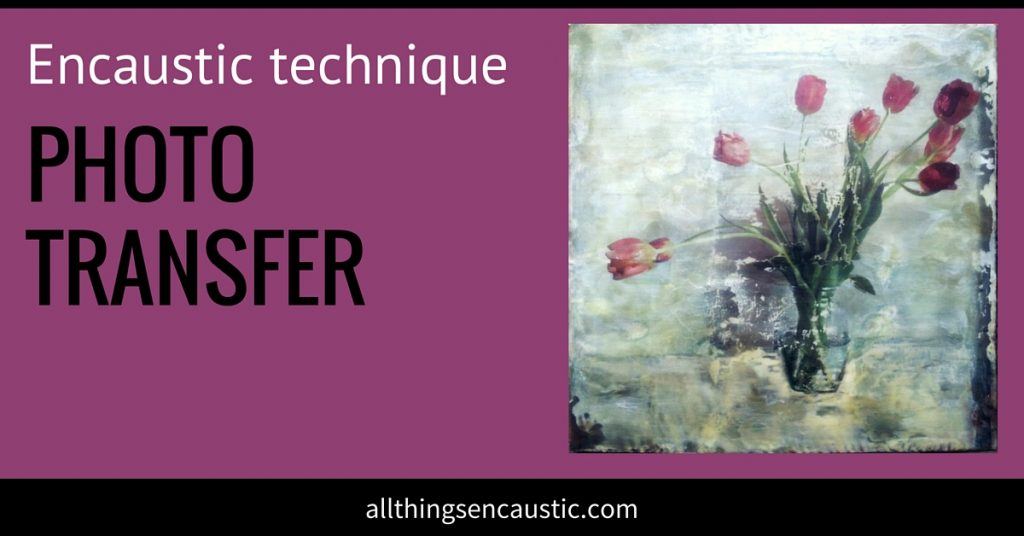
Photo encaustic combines photography with wax to create unique artwork. There are several approaches to this technique, including using a paper ground, photo transfers, and embedding the paper between layers of wax. The process outlined here focuses on the paper ground method, which begins with printing photographs on paper, adhering them to a panel, and then layering encaustic medium on top.
Here’s a step-by-step guide to help you get started:
1. Prepare your photograph
Before you begin painting photographs, you can enhance the image with photoshop or a photo editing app before you print them. Play with different photo filters.
2. Print your photo
For best results, use thin, absorbent paper—glossy paper resists wax, preventing it from bonding well or sinking into the surface.
You can use your computer printer or have it printed at a print shop. The image needs to be a bit larger than the panel. For panels larger than 8 1/2 x 11, print your image across multiple sheets and piece them together.
3. Adhere the photo to the panel
Ensuring the paper adheres properly to the panel is crucial. Any air bubbles or loose areas can cause the encaustic painting to separate from the substrate, particularly in humid conditions.
Use gel medium or your favourite adhesive, read more about glues here. Apply the adhesive to both the back of the paper and the panel—glue sticks best to glue. Position the paper glue-side down on the panel and smooth out any air bubbles. Put the panel under some heavy books for at least 12 hours until it is completely dry.
4. Trim the photo to the size of your panel
Once the glue has completely dried, place the panel face down on a clean cutting board. Using an X-Acto knife, trim the excess photo paper to match the panel size. Smooth the edges with fine sandpaper.
5. Tape the sides of your panel
Painter’s tape will keep the sides of the panel clean from wax drips, making final finishing easier.
6. Begin Painting with Encaustic Medium
- Apply encaustic medium: Use a natural bristle brush to apply 2–3 layers of encaustic medium. Or try an encaustic pour.
- Fuse the layers: Using an iron will give you a smooth finish
- Scrape where needed: If the wax has gone cloudy, use a razor blade or pottery tool to remove a thin layer of wax, bringing certain areas of the image into focus. Be careful not to scrape too deeply.
The Secret to Better Photo Encaustic
One of the biggest photo encaustic challenges is cloudiness. When fusing, the image is clear through the molten wax, but as the wax cools, it becomes cloudy. The natural tendency is to fuse more, but applying more heat isn’t the answer. Instead, gently scrape off the top layer of medium with a razor blade.
7. Work on the surface of the photograph
You can use a variety of encaustic techniques and drawing products on top of the wax to enhance your photo.
- Pan Pastels are the first thing that comes to mind. They are ideal for photo encaustic!
- Neocolors are Water Soluble Wax Pastels can be used to draw on top of wax. Gently fuse the wax pastel with an embossing heat gun.
- Foil transfer papers, India ink, and charcoal – Add expressive details.
- The encaustic stylus – Great for intricate line work.
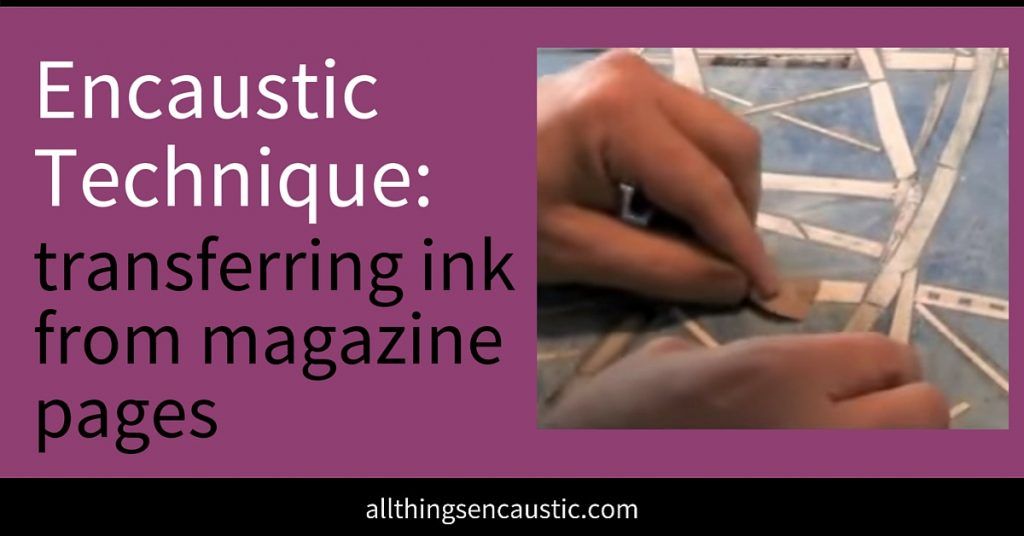
- Photocopy transfer – Personalize your piece by transferring text or images.
- Collage elements – Incorporate fabric, paper, or other materials for added texture.
8. Remove the tape and finish the edges
After painting, carefully remove the painter’s tape and finish the sides of your panel. I usually paint the edges with black acrylic paint and put it in a nice floater frame.
9. Buff the painting
To enhance the finish, buff your painting once the wax has fully cooled and cured. Use a clean, lint-free cloth, a nylon stocking, or simply the warmth of your hand to bring out a subtle shine. Avoid buffing while the wax is still warm.
Have something to add?
I’d love to hear about your experiences with photo encaustic! Have you tried it? Do you have a favourite technique or tip? Leave a comment below and let’s keep the conversation going.
What type of printer should I use for my photographs? Of the three types of printers inkjet, laser and laser jet, which is the best?
Hi Karen, A LaserJet printer is a laser printer, there’s no difference there. I recommend a laser printer over an inkjet.
Great article. I was wondering if there’s a particular brand of paper that was used? Was it just a basic matte 80# paper. Will paper is matte and “coated” work? I’m not sure how to tell if a paper is absorbable. Any suggestions would be greatly appreciated.
Hi. I too am an amateur photographer who loves encaustic. Can I use my glossy photos rather than having to print them on paper. I had some luck by sanding the glossy photo first before applying the wax. But I am wondering how long it will last?
Hi Deb, Glossy photos aren’t a good substrate to hold the wax. You need a toothy surface, that’s why we print on paper or on rice paper or do a photo transfer.
Hello: My name is Douglas and I am trying to combine encaustics with my photography and I have so many questions and you answered
some of them. Do you use encaustibord and or wood panels? I f so how do you mat and frame the piece? Thanks for your time.
Hi Douglas, I use wood panels but either is fine. What I do is frame paintings with floater frames. There is no need for glass as the photographs have been adhered to the panel and are covered in encaustic medium.
Hello
Thanks for this wonderful article. Can you use ink jet printed photos?
Nina
Hi Nina,
Yes, for this method inkjet works. For a photo transfer method, I have only had success with laser copies.
I have been using gel medium and I like the more permanent aspect of it. No chance of lifting.
Does anyone know of the long term viability of using the 3M adhesive?
I have been using it for about 9 months now and I don’t seem to have any issues with my images separating from the board nor do I get bubbles underneath the paper. I like that it is a dry adhesive and that I don’t have to wait 24 hours before I start to work.
It would be great if I could hear from others who have used this with long term success.
Really nice article. Thanks for sharing!
Hi. I am a complete newbie to this and am going to apply wax over Gum Bichromate prints. You mention using pan pastels as ideal, which I have a selection of. How do I apply the pastel powder – to the image first and then add wax or mix the pan pastel powder separately with wax before applying?
Thanks for your site, it has an amazing amount of information which I intend to work through, but I am itching to get started. Thanks.
Hi Alan, I’m not familiar with Gum Bichromate prints but here is how to apply pan pastels over encaustic medium. First, lay down layers of encaustic medium and fuse the wax. Then apply the wax with the sponge applicators to warm wax. You can then burnish the pastel into the wax with a gloved finger. The warmth of the wax and the friction created by burnishing will help the pan pastel and wax bond. You can fuse pan pastels gently with a heat gun on low or a blow torch but fusing will change the pastel.
Hi Ruth, thank you so much for explaining the process of applying the pan pastels. I am really excited about the possibilities of adding wax and paint to my work, but naturally the first attempt is feeling daunting…I just want it to be perfect first off I guess. Thanks again, this will help me take the leap!
Does anyone know how to give an “encaustic look” to a photograph DIGITALLY??
Why? The zen of creating the work is a huge part of what makes the piece satisfying. Attempting to recreate the “look” of an encaustic would be cheating yourself of the pleasure of creating a work of art.
Doesn’t that kind of defeat the purpose?
Hello. I am enjoying the blog and information it contains. Very informative. One question: What ipad photo apps does Tania recommend for creatively altering original photos to give them a painterly look?
Hi Linda, Repix and Waterlogue are 2 that she recommended.