
What is a Collagraph?
A collagraph is a printmaking process using collage materials applied to a board as a printing plate. To pull a collagraph print, apply collage materials such as acrylic mediums, carborundum, fabric, textiles, stencils, string, and a variety of organic material to a rigid substrate. Then apply ink to the collaged board and use it to print onto paper with an etching press. The resulting print is termed a collagraph.
What is Encaustic Collagraph Printmaking?
The Encaustic collagraph process uses encaustic wax in place of, or in addition to, collage materials.
A Merging of Mediums
The unique process of encaustic collagraph printmaking combines the methods, techniques and tools of both encaustic painting and intaglio (incised lines) printmaking in the place of collage materials. The texture, adherent and moisture resistant properties of encaustic along with its overall flexibility, makes it a highly exploitable collagraph printmaking material.
Introducing Wagner Encaustic Collagraph White
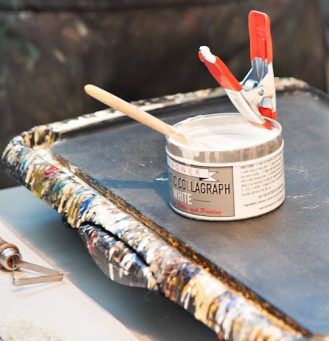
Wagner Encaustic Collagraph White is a white encaustic paint for use on collagraph printing plates in lieu of collage materials.
Wagner Encaustic Collagraph White is handmade in small batches by Elise Wagner. It is specially formulated to easily release from the paper when collagraph printing.
5 Steps to create an Encaustic Collagraph Print
Step 1: Create a collagraph plate
- Printing plates can be clear acrylic Plexiglas, cardboard, paperboard or mat board.
- Wagner Encaustic Collagraph White wax comes in a tin that you can simply set to heat on a hotplate or griddle. Once molten, you can apply the wax to your printing plate.
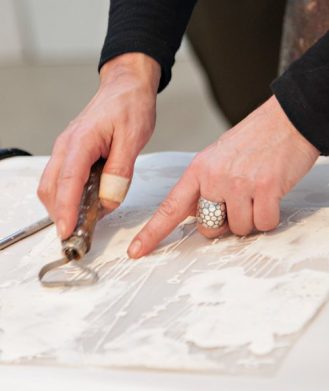
- Etch, scratch, carve or embossed into the encaustic medium. Typical tools for building the encaustic collagraph plate are ceramic incising and scraping tools common to encaustic.
- Fusing the wax is optional. An encaustic iron or sealing iron is perfect for embossing fabric and creating ridges and textures in the wax. Heated tools, such a heated wax writer or batik tjanting tools are also recommended.
Step 2: Coat the plate with ink and wipe it
Once you’re happy with your plate, you can apply ink. Do not use oil-based inks for this process. The natural beeswax in Wagner Encaustic Collagraph White forms the perfect marriage with Akua soy and honey-based non-toxic intaglio inks.
The ink is applied and spread with matboard scraps or with a brush. Stiffer stencil brushes work best to get into encaustic textures.
Once the plate is fully saturated with ink, wipe it with a tarlatan: a super-sized cheesecloth that skims over the plate and pushes the ink further into lines, marks and crevices. Akua wiping cloth is used for a final wiping on some of the raised relief lines and marks. To further highlight raised lines and textures, you can use a wet Q-tip to shade areas or erase the ink. As a finishing touch, you can also use a fine brush to hand paint or accentuate any marks or raised areas with a contrasting color.
Step 3: Soak the Paper
Akua Inks dry through absorption, therefore, I have found that encaustic collagraphs print best with wet paper.
Some of the papers I have used are Rives BFK, Stonehenge, Arnhem1618, Fabriano, Kozo and Kitakata. When teaching, I used Arnhem 1618. We put the paper in a paper soaking tray with water while making and inking the collagraphs.
Step 4: The etching press

My press is a Takach 24″ x 48″ however, they come in a variety of sizes. I first started experimenting using a rolling pin and, although it makes somewhat of an imprint, the etching press is definitely the way to go for the best results for collagraph printing.
Once your plate is inked and wiped, it is time to register the paper and set the press pressure. I take the paper out of the soaking tray and blot it on a towel. I then place the paper on the press, register it and weigh it down with a paperweight to keep it in place while I set the plate on the press.
All presses vary on what is the best pressure and settings will be different depending on the width of your printing plate. I tend to use 1/8″ thick clear acrylic plexiglass. I have also printed using 1/4″ Plexiglas and the pressure is different. I keep a log at my press and write down all pressure types for all the plates I work with as a reference. It is important to use 1″ foam between or in place of the press blankets when printing any type of collagraph. The foam allows for a better and richer print and is forgiving to the raised collage materials on the collagraph.
Step 5: After pulling the print
After pulling the print, it is blotted with tissue paper to remove any excess ink that didn’t absorb into the paper. You can place the print on the wall or in a drying rack overnight before then flattening under a heavy piece of glass or books. Once flattened you can number and sign the print.
It is possible to use the plate, again and again, varying the colors for small editions. Optionally, you can further enhance or alter the plate after making one unique print from it, this would be considered a monotype (one).
When editioning monoprints, because these plates make up to 20 prints, I will number them 1/20 and sign. Monotypes can simply be 1/1 and signed.
[click to enlarge images]


Comments/Questions?
If you have any questions, post in the comment section below. I would be happy to respond.


Elise,
Thanks for the answer on foam source! My next question, since I have never done encaustic, is what is the difference between regular encaustic ingredients and yours? If that’s proprietary, just how is the result of one or the other better or more favorable for this process? Thanks so much for lnformation!
Kat
Hi Cindy,
Oil-based inks will not work, the boiled plate oil they are made with causes them to stuck to the paper. Akua inks, Made with honey and soy, are ideal for printing encaustic collagraphs.
This link is to the wax I sell on my website – https://www.elisewagner.com/Wagner-encaustics/collagraph-white with tips and suggestions on the bottom of the page.
Elise
I am having a difficult time finding out what type of foam and where to get it, for Collagraph printing. I see mention of it, but it is never listed with a resource point, as other materials are. There are many types of foam! Please let me know what and where I would get this foam sheet! Thanks so much.
kat
Hi Kat,
Here is a link – https://amzn.to/32KDHmm to the foam on Amazon. It is .5-1” thick medium firmness and can be purchased by the yard at most fabric stores. I get it cut to the size of the press bed or loop it under the roller if it is too long. No need necessarily to use blankets although I put the foam in between mine.
Elise
I have been using various epoxy glues to make my collagraph prints for many years. I like to put these epoxies under aluminum foil, and then work on the surface while the epoxy hardens. If I cover the entire plate with your white encaustic for collagraphs, do you think I could use oil based ink to print the plate? Thanks!
Really clear! I came across this as have watched a You-tube film of carborundum etchings being made, and using candles (of varying types), along with chinagraph pencils to draw over the carborundum ‘to block gaps’ so as to provide texture lines. I am going to experiment with this, and now develop the encaustic approach you have described. (Film was made by lady who created Akua paints.)
What a joy to find this tutorial. A recent convert to encaustic (via Nancy Crawfords brilliant online course) I love collagraphs – who’dathunk I can combine the two… woooo!
Thanks Jac! You can see a brand new video of the process here:
https://www.youtube.com/watch?v=Bc8WKpFf9lg