
Artists working in encaustic are always on the lookout for innovative ways to create texture and patterns in wax. Silicone cake decorating stencils, onlays and impression mats, are excellent for adding intricate designs to encaustic paintings.
Why Silicone Stencils Work for Encaustic Art
Silicone stencils are:
- Translucent, which makes positioning simple and precise.
- Flexible and durable, making them easy to use on uneven surfaces.
- Heat-resistant, tolerating temperatures up to 450°F.
- Non-stick and easy to clean, requiring just a quick wipe with a paper towel.
Using Fondant Onlay Stencils in wax painting
Onlays were invented as an alternative to using stencils in cake decorating and they work equally well with wax.
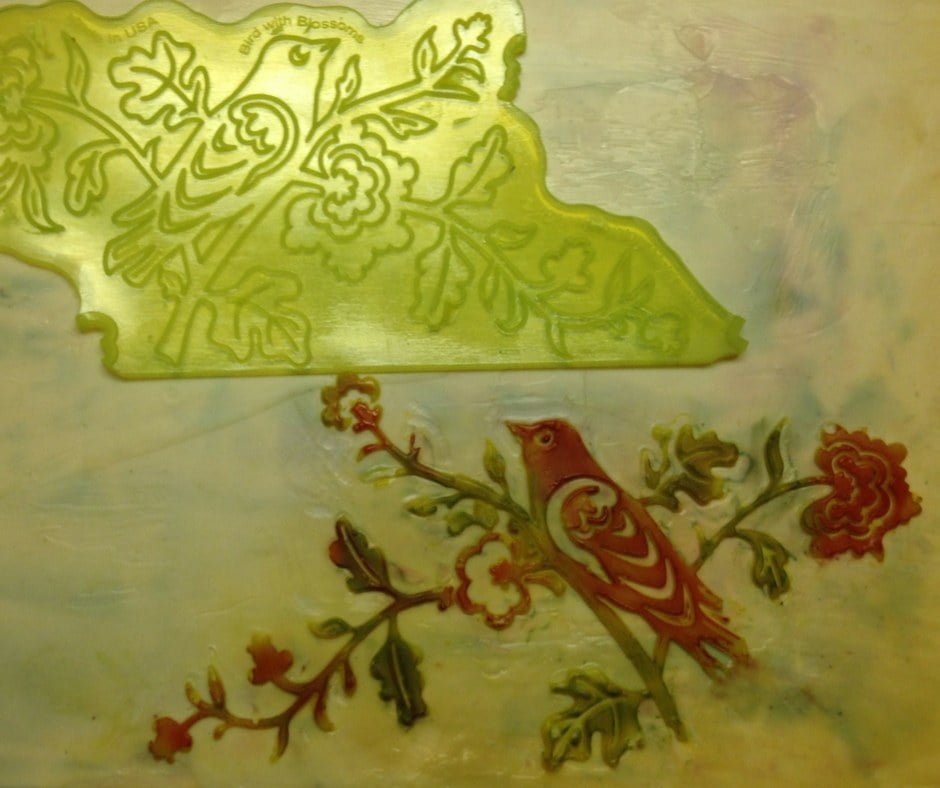
- Apply encaustic medium to the onlay with a brush
- The wax layer will be thin so it will cool quickly
- Warm the surface of your encaustic painting – if the onlay has cooled completely gently warm it too with an embossing tool or heat gun on low
- Position the onlay face down on the warm painting
- Press then gently peel back the stencil
- Remove unwanted areas of the design by poking with a sculpting tool
- Gently fuse
- On the sample above, I used Pan Pastels to add colour to the raised stencil
Alternatively, you can also lift stencil pieces from the onlay and place them one-by-one onto you painting.


Using Impression Mats & Onlays in encaustic
- Heat the wax on the substrate – the wax needs to be warm and soft
- Use a heat gun to warm the Silicone Marvelous Mold
- Flip the impression mat over onto the top of your painting and push down to evenly apply pressure.
- Remove the mold and wipe it off with a paper towel to remove any encaustic medium and paint.
Enhance the patterns using:
- Drybrush accretion: Build up texture by applying thin layers of wax with a dry brush.
- Pigment sticks: Fill the textured surface with oil paint, wipe off excess, and fuse gently.
- Wax fills: Add encaustic medium to the stencil impression, then smooth and fuse with an encaustic iron.


Casting 3D Shapes in Wax
Silicone molds can also be used to create three-dimensional wax shapes.
Tips for Success
- Test a new stencil on a practice piece to get a feel for the process.
- Clean the stencils thoroughly after each use to avoid wax buildup.
- Once a stencil is used for encaustic, avoid reusing it for food-related projects.
Share Your Ideas
Silicone stencils work really well with encaustic. Have you tried them in your work? Share your experiences and ideas in the comments below!


I’m excited! I have some silicone mold putty that I have used to make molds for jewelry that I will flatten and make a pattern mat. Can’t wait to try this technique. Thank you.